1. There are two ways to start calculating salaries: either by clicking the New calculation button next to the employee's name or by clicking the Payroll button in the top bar.

2. Payroll is a four-step process, the first step of which is already complete unless you need to change any personal details.
3. If you want to edit personal details, select 1. Employee and make the necessary changes.
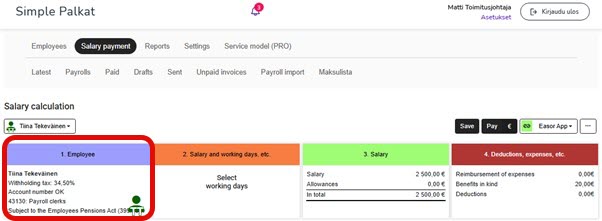
4. Once the personal details are correct, select 2. Salary and working days.
5. Select the payday and salary period. If the payday is left blank, the salary will be transferred to the employee's account as soon as the bank transfers the money.
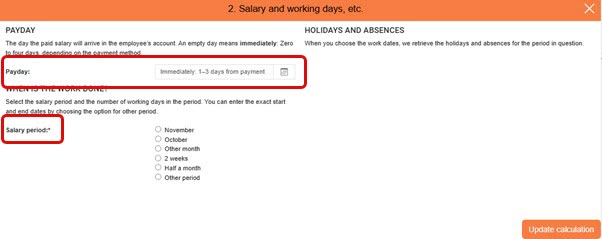
Please note that if you select a specific date, the money will be transferred from the company's account on the day before the payday (=due date). If the employee and the company have the same bank, the money may be transferred to the employee's account on the due date.
6. Once you have selected the desired payday and pay period, select Update calculation. Updating the calculation always saves the changes you have made.
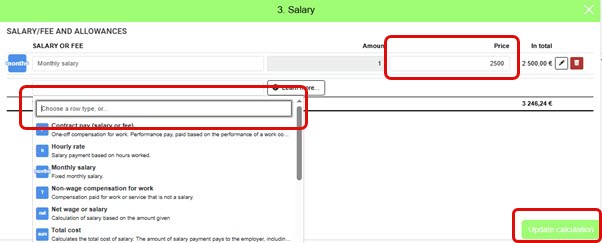
7. Select 3. Salary. If default salary lines have been added to the employee's personal information, they will appear as ready-made suggestions. You can edit the default salary lines and add new salary types. When the necessary salary lines are ready, select Update calculation.
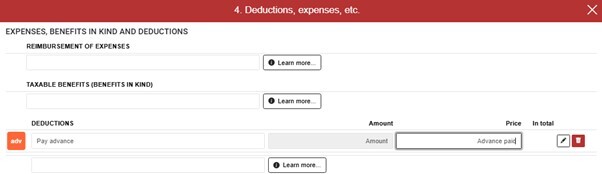
8. If you want to pay expense allowances in connection with salaries, process fringe benefits, or various deductions, select 4. Deductions, expenses, etc. Finally, select Update calculation. For more information on adding fringe benefits, see the section Additional instructions and frequently asked questions.
9. The payroll calculation process is now complete. The net salary transferred to the employee's account is shown at the bottom right, and the employer's total salary cost is shown at the bottom left. The employer and employee calculations show more detailed breakdowns of the calculated salary.
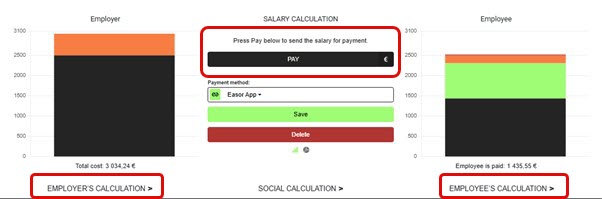
10. Select Pay in the middle of the Payroll Calculation view to proceed to creating an invoice for the salary payment.
11. In the Salary payments view, you can view the invoices that have been created.
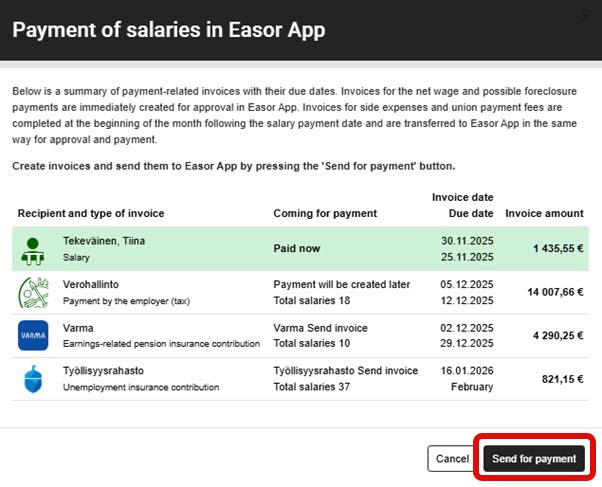
12. Select Send for payment to create an invoice for the salary to be paid in the Payments service.
It may take several minutes for the invoice to be created in the Payments service.
13. Accept the invoice in the Payments service, and the salary information and separate notifications will be sent to the Income Register.
14. The Tax Administration's invoice is generated on the 6th day of the following month.
15. The employment pension company and the Employment Fund send invoices for wages later based on the information sent to the Income Register (provided that the insurance company and insurance number have been entered into the program).