The Receipt or Payment function allows you to submit receipts for expense reports in the Easor App mobile application.
This function requires that you have set up your account number in the Settings - My Details section.
1. Select Receipt or payment on the front page of the mobile app.

2. Take a photo of the receipt or load a receipt from your phone.
3. Crop and rotate the image if necessary.

4. Add more images using the + button.
5. Accept the image(s).
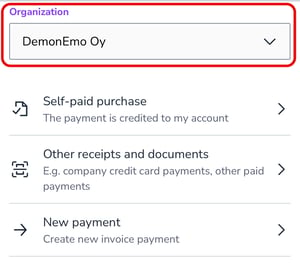
6. Check that the correct organization is selected and then select Self-paid purchase.
7. Check the receipt details, such as the amount, currency, and date.
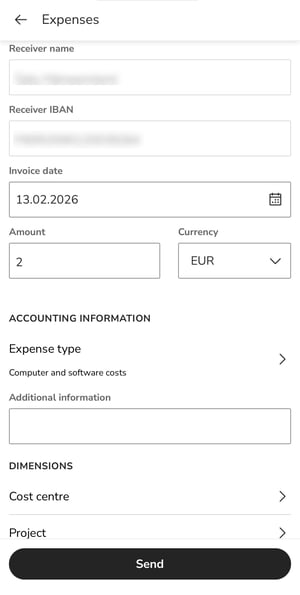
8. Select either the Expense type or enter Additional information.
9. Add dimensions (optional).
10. Send the receipt.
11. The expense invoice will be transferred to the Payments service for review/approval in accordance with the invoice circulation settings.