You can create a new sales invoice from scratch or copy a previous sales invoice as a template.
Quick guide - Start from scratch
- Click the New invoice button on the Invoices page or select New invoice from the three-dot menu on the customer card in the customer register.
- Select a customer from the list. The customer's details are imported from the customer card. You can add a new customer by clicking the Create new customer button.
- Edit the sales invoice details by clicking on the top of the invoice. Mandatory information is marked with a red triangle.
- Add an invoice line with the Add new line button and select the product from the product register or enter the product name. In addition to invoice lines, you can add subheadings with the Add heading button.
- Add the invoice line details. Mandatory information is marked with a red underline. Save the invoice line by clicking the Close line button.
- The sales invoice delivery method is shown in the Send invoice button. Select the delivery method by clicking the arrow in the Send invoice button.
- The invoice will be sent to the customer according to the settings.
Quick guide - Copy a previous invoice as a template
-
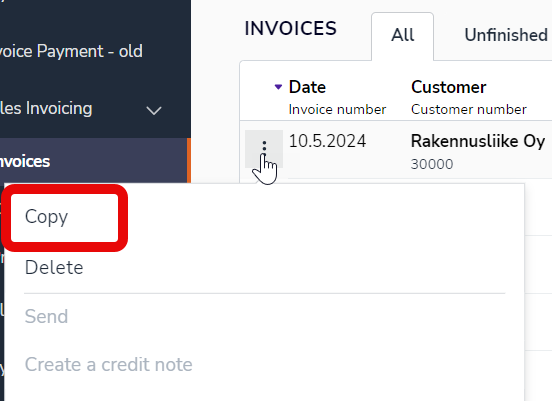
In the Invoices view, select the sales invoice you want to copy.
-
Select Copy from the three-dot menu on the line of the sales invoice you want to copy.
-
Select the customer and edit the sales invoice details by clicking on the top of the invoice.
-
Edit the invoice lines and their details.
-
The sales invoice delivery method is shown in the Send invoice button. Select the delivery method by clicking on the arrow in the button.